Hi Everyone. I have finally got round to adding my latest newsletter updating everyone with what I and the ladies who attend my workshops have been up to. The newsletter below is the shorter version. If you would like to see the complete newsletter, click on the newsletter link. This will take you to my website. The newsletter is on the news page.
NEWSLETTER
I will start with what we have been doing in the Rubber stamping Workshops,
held on the 2nd Friday and Saturday of each month.
We have covered many different mediums and techniques. Below are some
examples from the last few workshops.
These cards were made by some of the girls using Indigo Blu Rubber Stamps
and distress inks to make the background.
Watercolour pencils were used to colour the image.
This card was again using Indigo Blu Rubber Stamps. The mediums
used were clear embossing powder, distress inks and alcohol inks.
The die cut shapes were using spellbinder dies.
This image is not particularly clear but hope you can see
enough for the overall design.
Using Cosmic Shimmer Fibres and film we created this butterfly card.
We first cut two pieces of film and placed some fibre in-between.
This was then ironed together and put though the die cutting machine
using a large butterfly die. The body was covered in Stix 2 Seed Bee'ds.
The background was coloured using Pan Pastels and embossing powders
in the bottom corners. The flowers (Chocolate Baroque) was stamped
using brown memento. Before all these techniques were used the
background was embossed using a plastic template.
Back in the year I put together this project for the girls using the,
yes you guessed it Indigo Blu stamps. This beautiful stamp was perfect
on this exploding box and made a lovely gift. A candle was decorated
to go into the middle of the box. This workshop was a little more work
than usual therefore was run over the rubber stamping and
pro-marker workshop. The images were coloured using pro-markers.
Our most recent workshop, we made a card with a slight difference.
The front of the card we stamped the latest Indigo Blu stamp twice
and a butterfly from Chocolate Baroque twice.
We used prisma pencils to colour the images in. The background was
again an Indigo Blu Stamp but you knew I was going to say that :)
Inside the card a box was made so a gift can be placed inside.
The card was tied together with ribbon.
Every couple of months I hold all day workshop to cover the more
involved projects. The last 3 workshops we have used
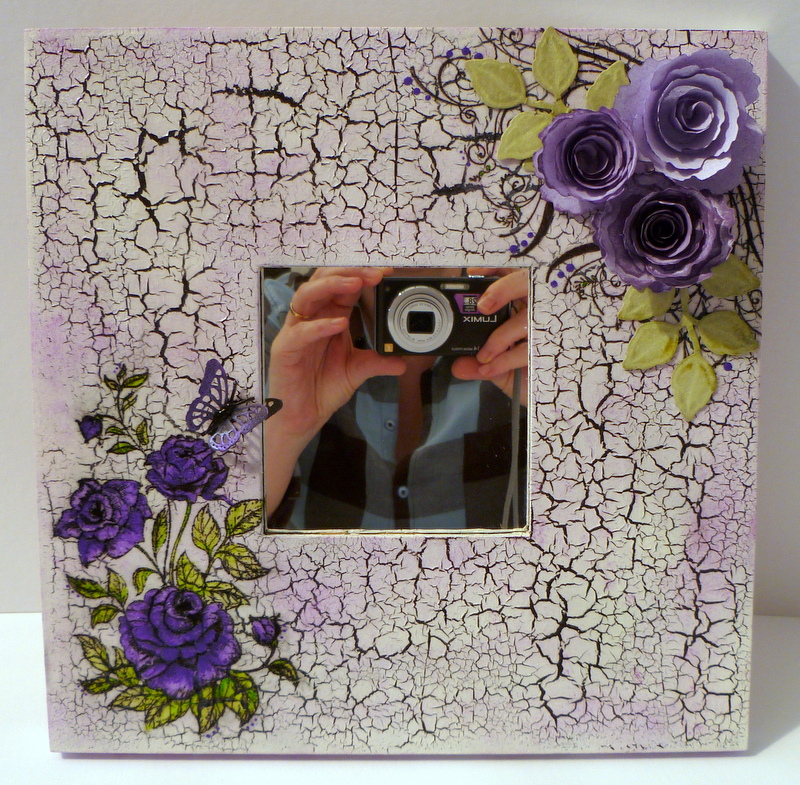
Jo Sonia paints and crackle mediums to decorate a mirror,
tissue box cover and a clock. The Jo Sonia Acrylic Paints are second to none.
They give wonderful results and the pigment in these paints are far
superior to most other makes. The price for the individual paints
are inline with most other paints on the market. I am confident
you will not be disappointed if you decide to purchase this make of
acrylic paints. I will have these paints listed on my website for you to
purchase but in the mean time if you are interested in finding out
more or to purchase you can email me via my website www.craftyneeds.com.
Below are the photographs of the last 3 workshops.
The clock and tissue box cover were made from 6mm MDF.
These are available to purchase from my website www.craftyneeds.com.
I have also had some time recently playing with the Jo Sonia Paints
myself using the various different mediums and texture paste.
I totally lost myself and before I knew it my Husband was walking
back though the door after being at work all day.
I hope you like what I achieved.
As well as the above we also enjoyed making an A4 book to house
information on different mediums and room for notes etc.
The front image was a digital image and was coloured
using pro-markers. The book was put together with the bind it all
and the papers used to decorate were Bo Bunny papers.
I hope you have enjoyed reading the above. I
f you would like to see all of the newsletter you can access this
though my website www.craftyneeds.com.
Happy Crafting Jeanette :)
www.craftyneeds.com
www.facebook.com/craftyneeds ~
www.crafty-needs.blogspot.com ~ www.eurekacraftdesigns.blogspot.com
07795210789
|
www.craftyneeds.com
www.facebook.com/craftyneeds ~
www.crafty-needs.blogspot.com ~ www.eurekacraftdesigns.blogspot.com
07795210789
|